Need help getting started?
Install, allow permissions, and master the basics of Shelfinder.
🔽 How to Install
Shelfinder is distributed as a standard macOS disk image (.dmg) and is Apple notarized.
After downloading Shelfinder.dmg, double-click it to open. Then drag Shelfinder.app into your Applications folder. Once copied, eject the disk image and launch Shelfinder from Applications.
🛡️ macOS Security Prompt
Shelfinder is Apple notarized. In most cases, it opens normally. However, depending on your macOS security settings or download source, Gatekeeper may still show a confirmation prompt the first time you open the app.
-
Open Shelfinder from Applications.
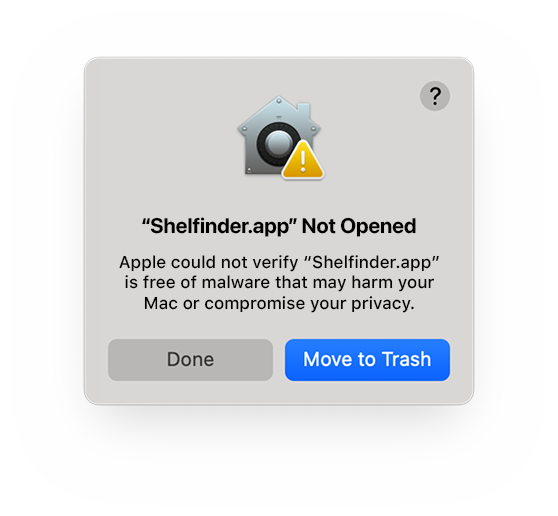 If macOS shows a protection dialog, click Done.
 -
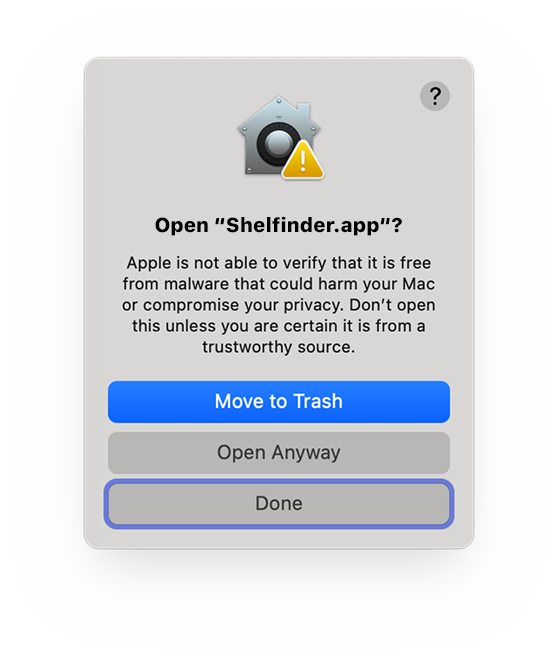
Go to System Settings > Privacy & Security.
 Scroll down and look for a message about Shelfinder, then click Open Anyway.
 -
Open Shelfinder again.
 Confirm when prompted. Shelfinder will now open normally.
🔐 Permissions
Shelfinder integrates deeply with Finder and system drag & drop. For full functionality, macOS may request the following permissions:
- Accessibility – required to track Finder windows and drag operations.
- Input Monitoring – required to detect file interactions.
The app will guide you to the correct system settings when needed. You can review or change permissions anytime in System Settings.
⌨️ Global Shortcut
Assign your own global shortcut using keys like Command (⌘), Option (⌥), Control (⌃), Shift (⇧), and any letter or number. You can change it anytime in Preferences.
📦 Free vs Pro
The free version lets you access your 3 most recent items.
Upgrade to Pro to unlock extended history, unlimited items, and all advanced Shelfinder features.
💡 Common Questions
Q: Shelfinder doesn’t open after installation.
A: Open System Settings > Privacy & Security and allow Shelfinder,
then try again.
Q: The global shortcut doesn’t work.
A: Make sure Accessibility permission is enabled for Shelfinder.
Q: Shelfinder isn’t detecting my files.
A: Check Input Monitoring permission and restart the app.